
Sewing a Camp Shoe with Paracord
Paracord is one of those materials, such as duct tape, that seem to be able to do everything. It ties up your gear, hangs up for bear bag, and you can even sew with it. But along the endless amount of tutorials about paracord, you will be hard-pressed to find a tutorial on how to sew much of anything with it. To demonstrate how capable it is of sewing together damaged gear or making gear for on the trail we decided to make a shoe. The shoes we will be demonstrating are great for around camp and for around the house. They fold up easily and you can make them out of a variety of materials to customize them for what function you wish you use them for. In our case we used a lightweight canvas and jersey cotton.
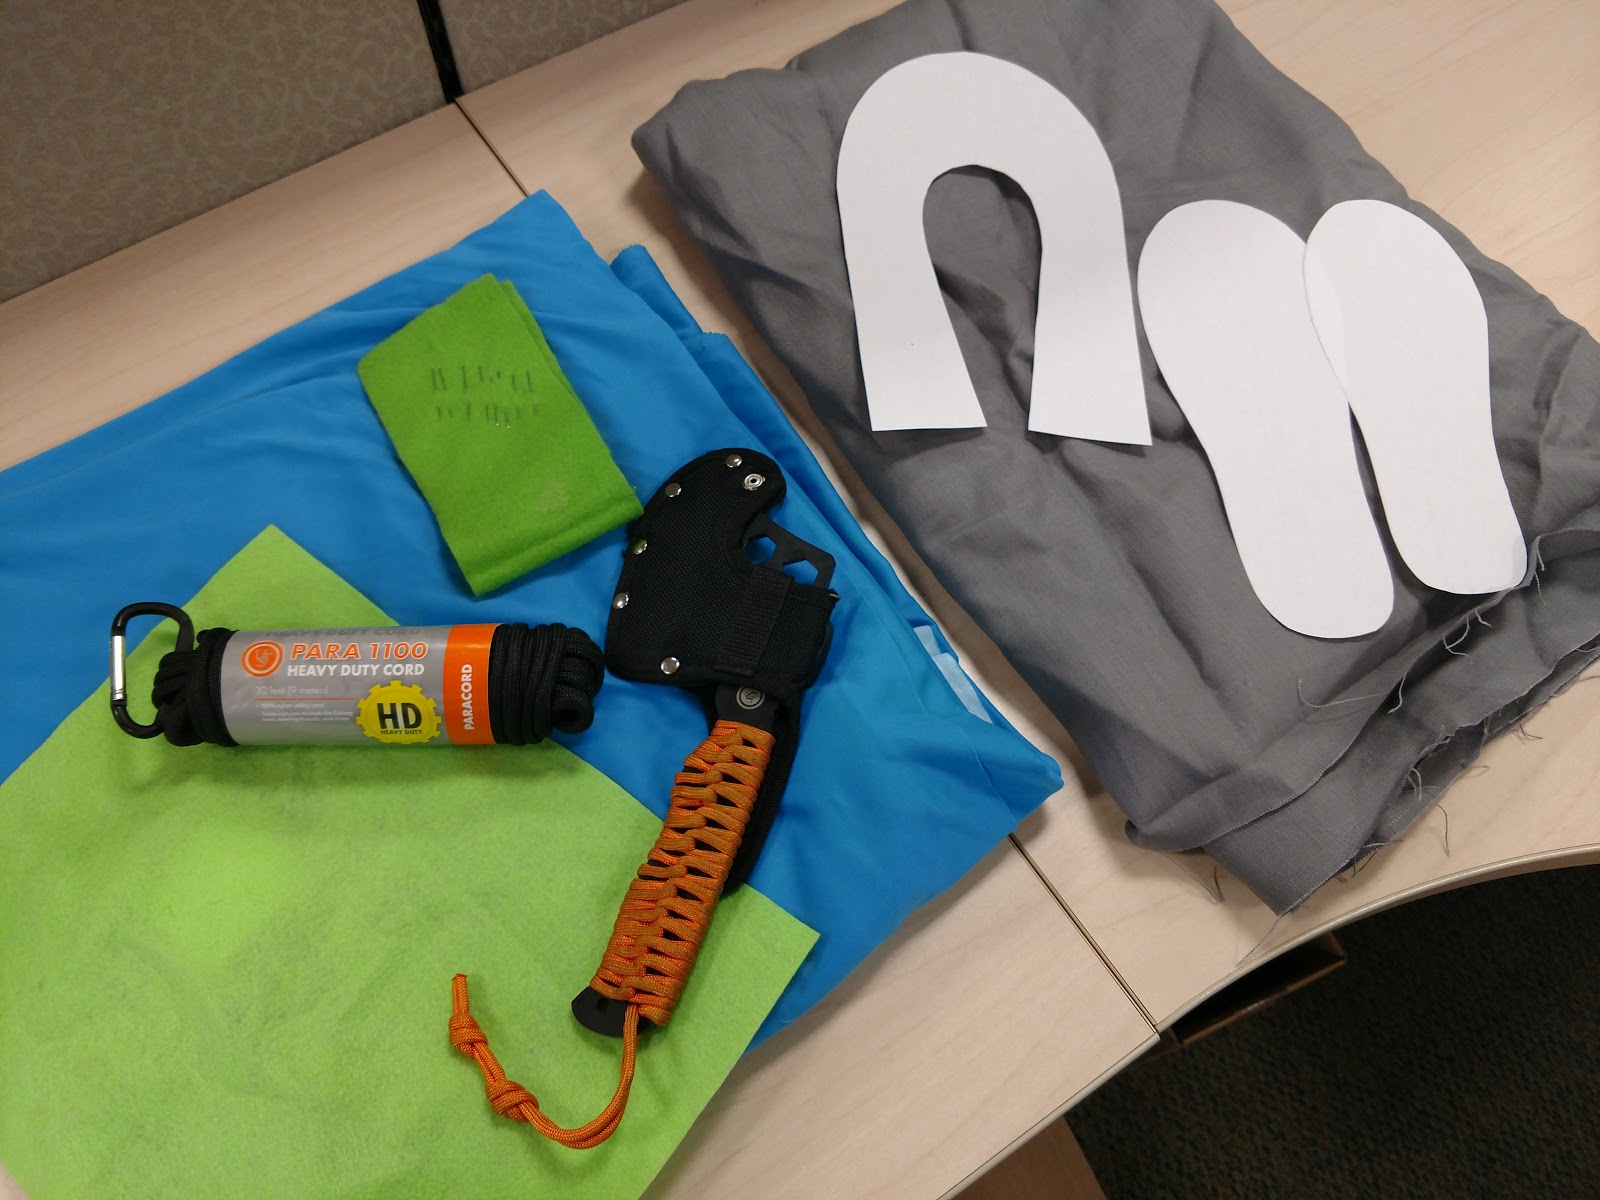
Let’s gather the materials.
Felt or a sturdy flexible material
Thin canvas or water resistant material
Soft fabric, we used cotton jersey but water resistant soft comfy material is recommended
Paracord
Scissors
Chalk or pencil to trace the pattern
Ruler (for making the pattern)
Paracord Cutter (we used a Parahatchet FS)
Sewing needles
1. Make the Thread
First we need to actual thread for our shoes. It’s a little bulk to use the whole paracord 1100 so let’s get out some of the fibers. You can also use these fibers for fishing line.
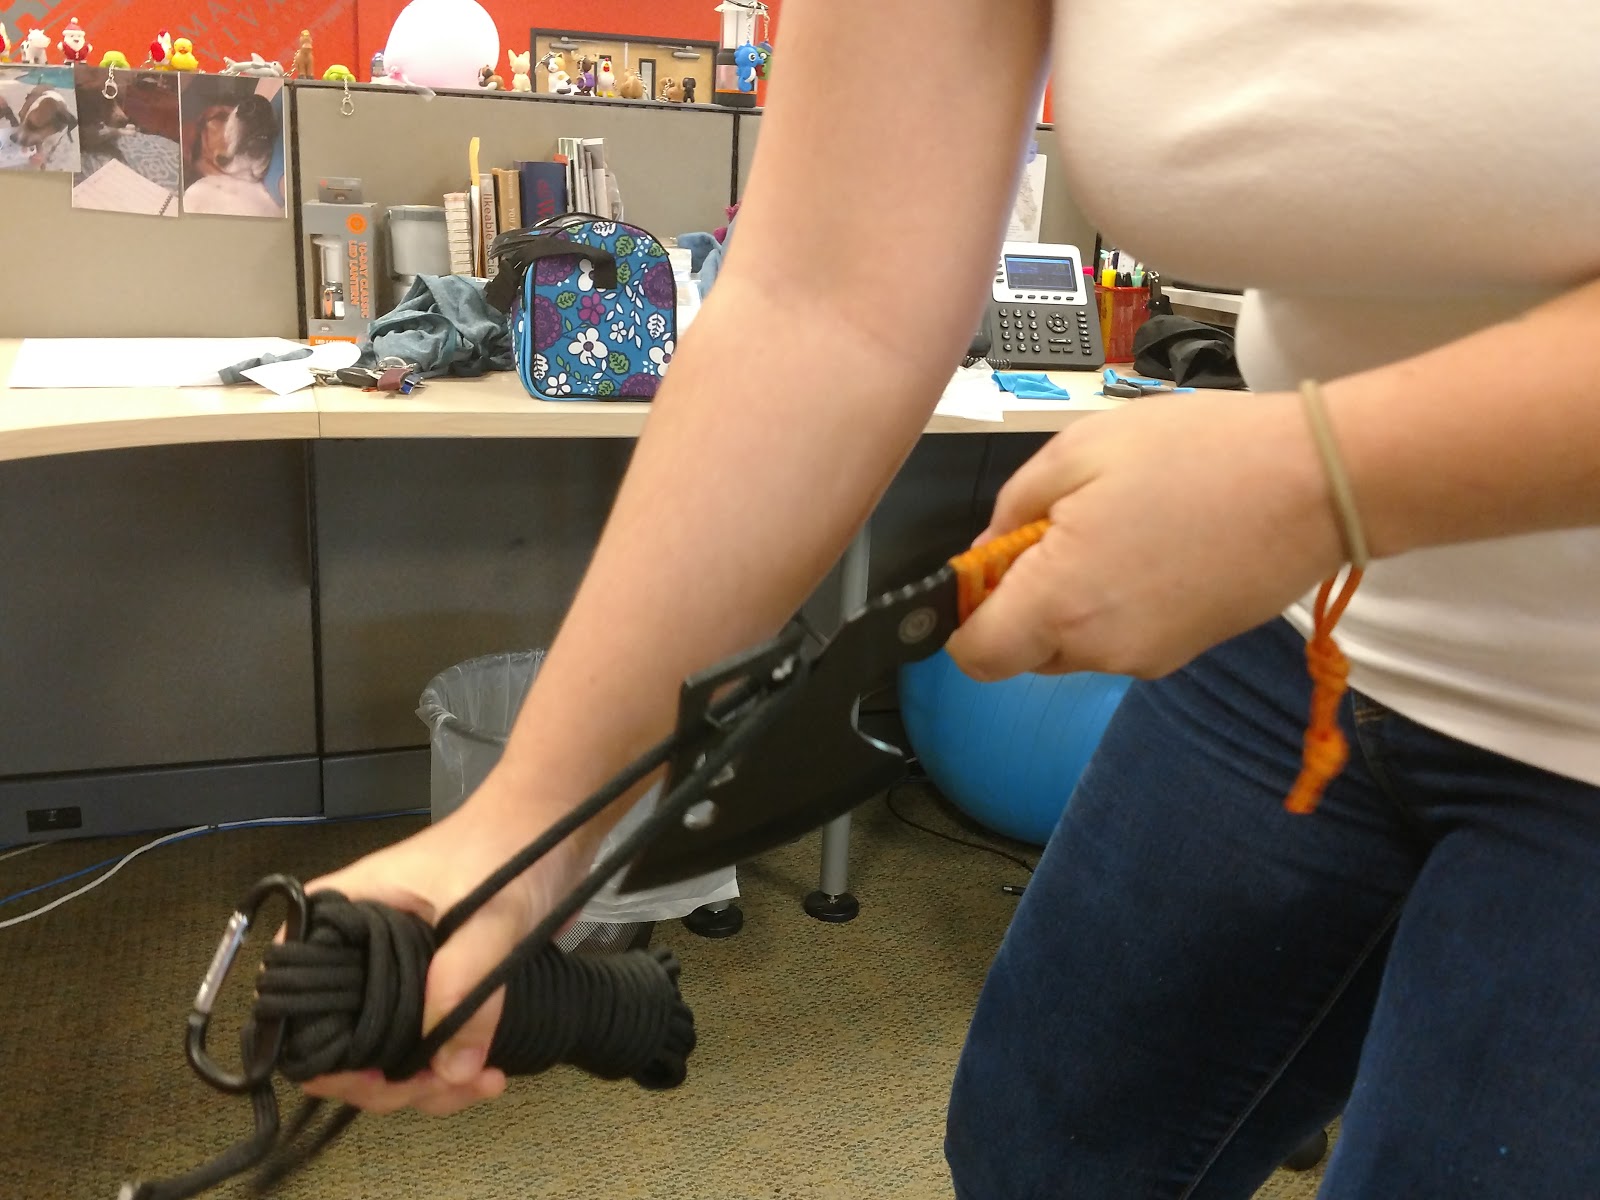

I discovered that the fibers in the paracord were still a little thick to be practical. No fear! The paracord can be broken down further to make sewing thread! I would recommend finding a needle that is just big enough for the thread. Picking a larger needle, will cause you to have difficulties pulling it through several layers of fabric that we will have at the end of the project.

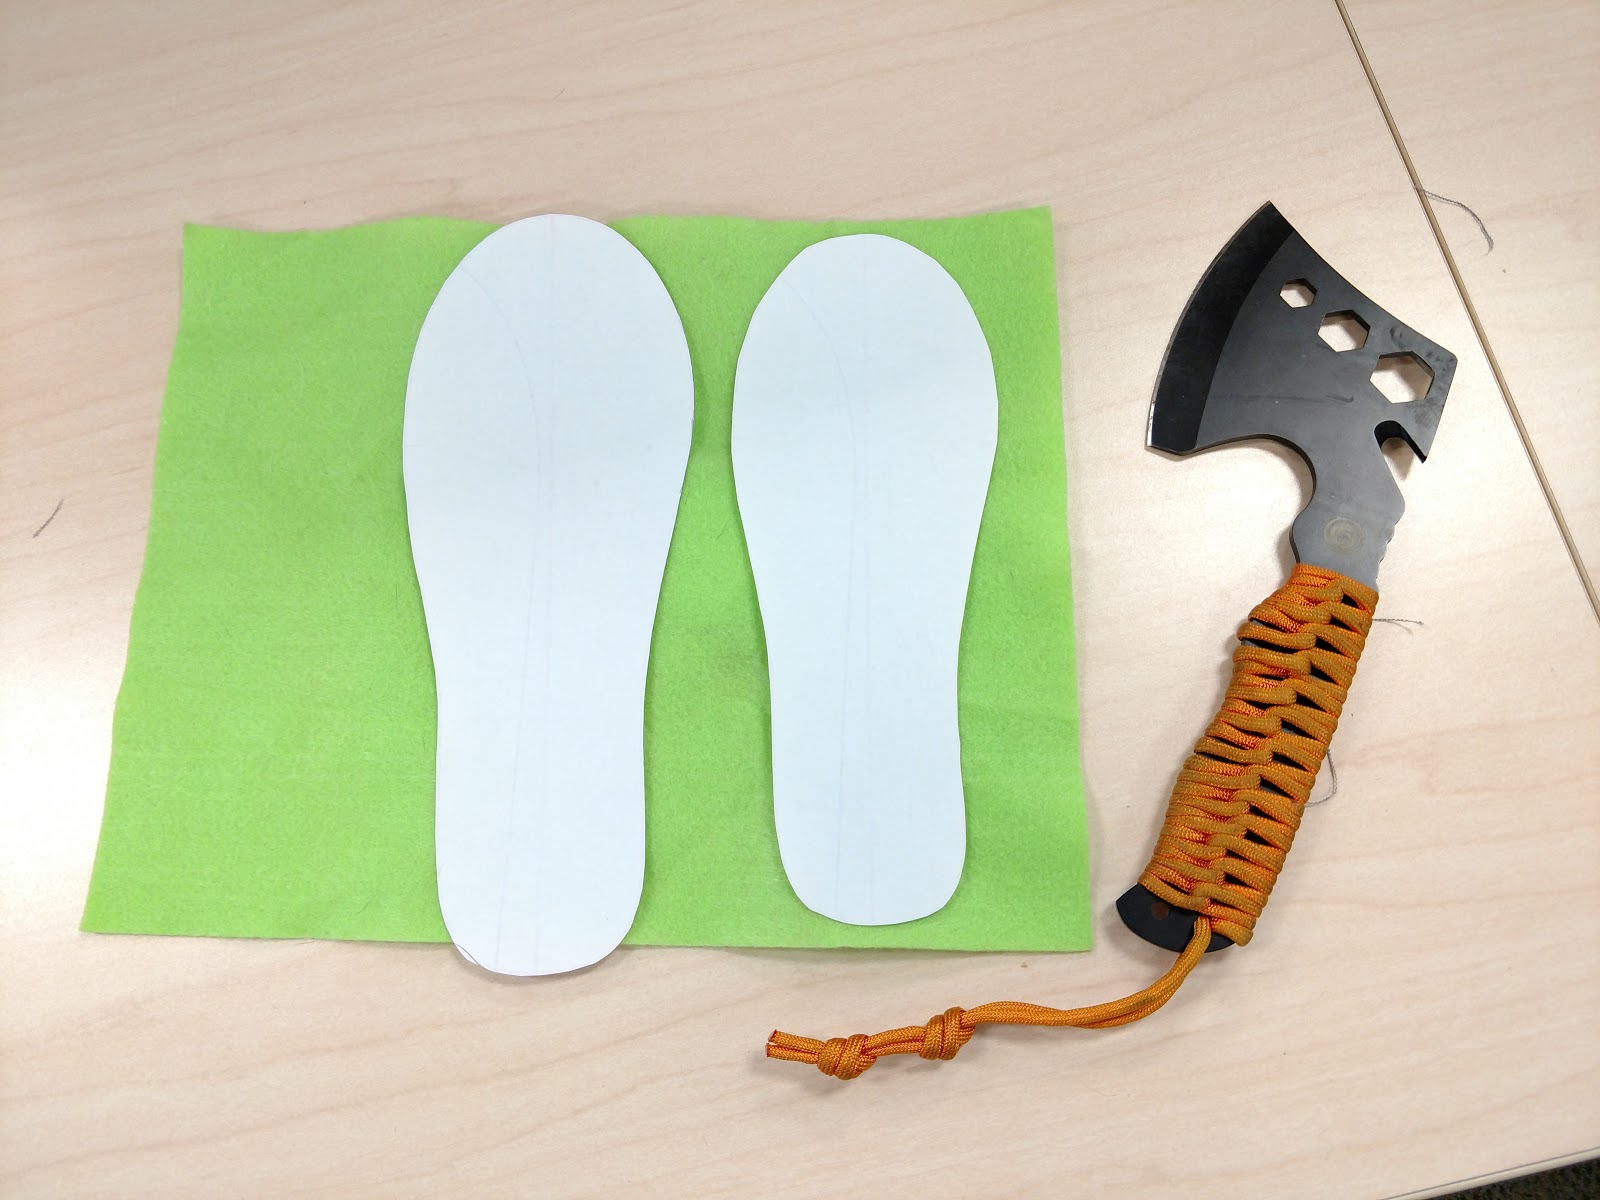
2. Make the Pattern
Next, we need a pattern. Now you will probably notice we are not providing a pattern because each foot is different. So unless you are small like I am, or have kids, they will not be super helpful. However, I will provide you with the steps on how to make your own:
The Sole:
For the sole you want to trace your foot. Remember, to make it a little larger than your actual foot size since some of the fabric will be used to sew together. After you trace it, give yourself some extra room in the front for your toes. Your best solution is to use the insert of one of your day to day shoes and tracing that.

The Top:
The top is a bit harder but with some measuring it will not be too difficult. This process of making a shoe will also allow you to customize it some. First, remember that the top of the shoe is going to be the same length as the sole. For the width, measure how far you want to the to go over your foot in the front and in the back. In between the two points you should have a gentle curve to allow comfort for your ankle. In the end it will look like a horse shoe, the thickest on top, thinnest in the middle, and moving out again on the bottom. The bottom will have a slight angle down from the middle.

The Felt:
For the felt you are going to make a smaller version of the sole that will be sewn on the sole of the outer fabric. You can also put felt on the “Horseshoe” but I didn’t find this necessary since it was already pretty stable.
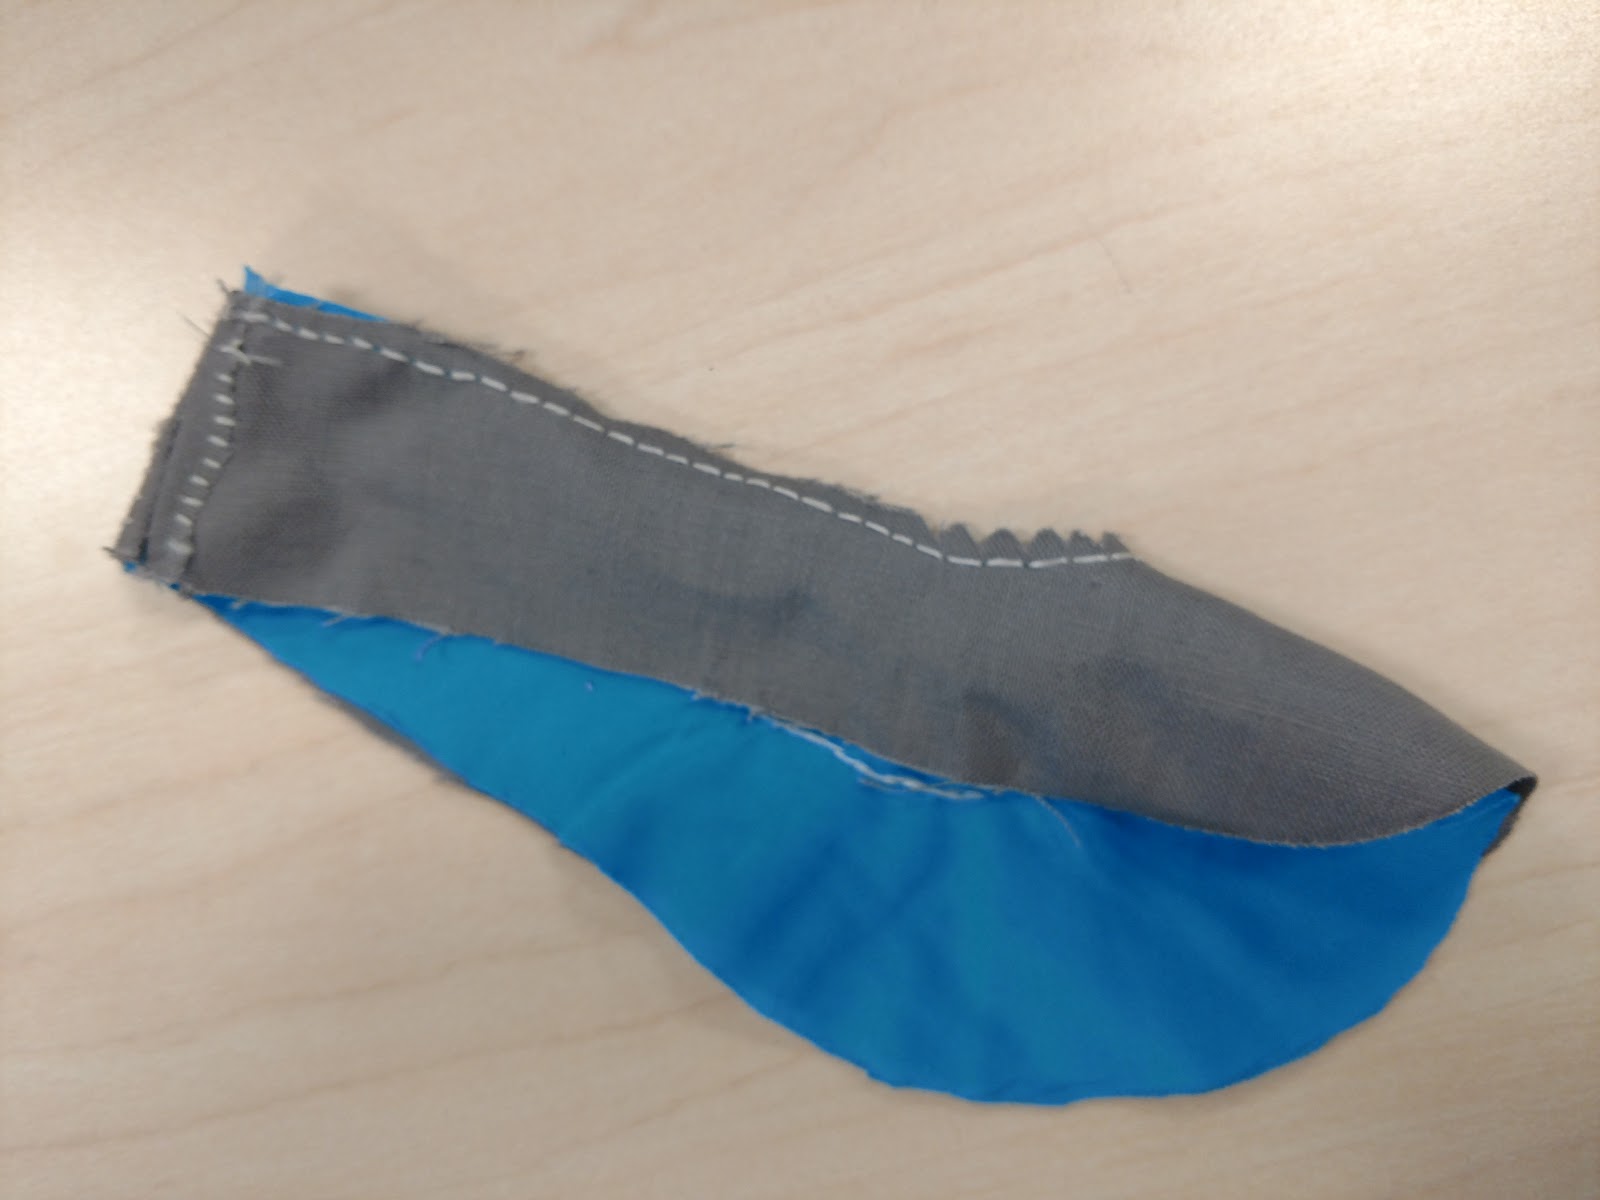
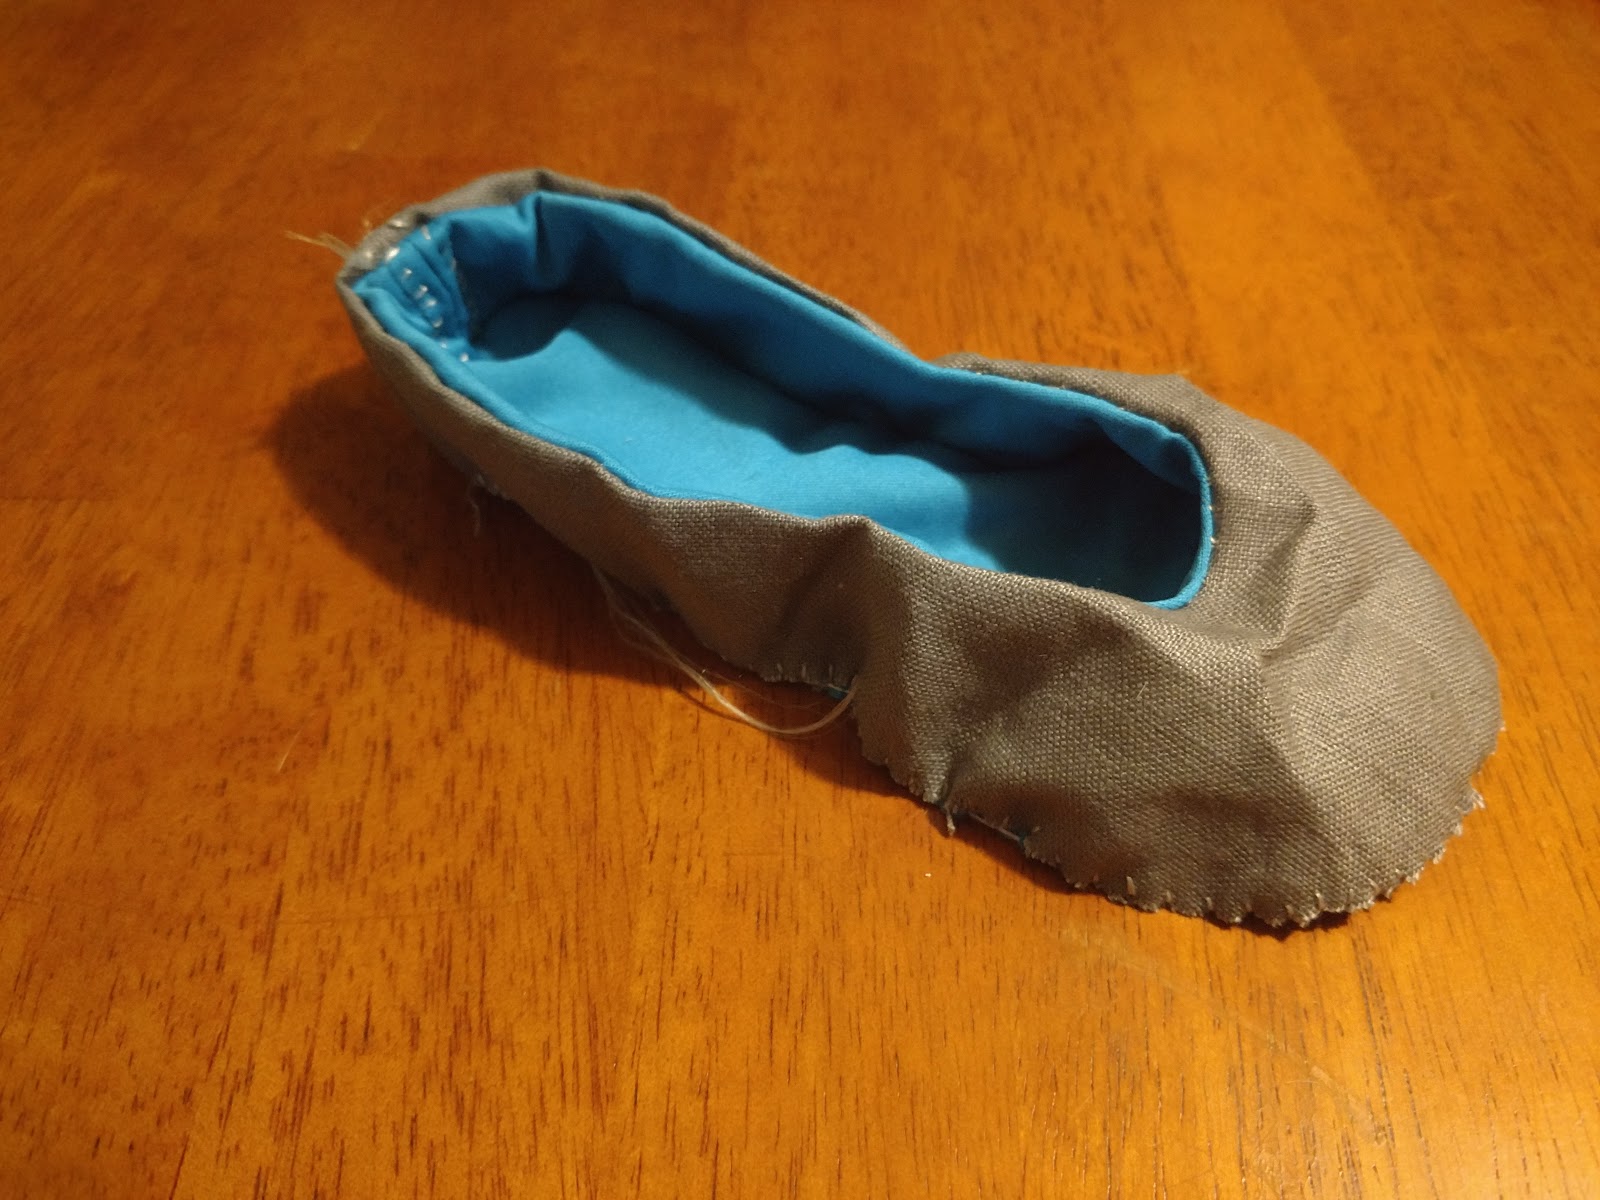
3. Start Shaping the Shoe
Sew the edges of the “horseshoe” together. Leave about a quarter inch of extra fabric at the edge of the stitch, this will be used to keep the shoe nice and neat. I used a simple running stitch to keep the two pieces of fabric together. You can probably iron the two extra pieces flat but I ended up sewing them. It made for an interesting pattern on the back of the heel at the end of the process. You will repeat this process for both the liner and the outer shell.


4. Attach the Upper and Bottom Piece
Let’s start putting pieces together! We used a running stitch with the folded pieces facing the outside on the heel. The goal is that once you fold the shoes once again they will not be visible. You want to leave about an 8th of an inch on the edge when stitching. Once, finished you will cut small triangles in the outer fabric to help fold the two large pieces over.


Flip it! Fold the fabric over so you do not see the stitching.
5. Attach the Sole Lining
I combined the step of sewing the bottom pieces and attaching the lining of the sole. Make sure to pin the three layer of fabric together since it will be difficult to hold together as you sew along the seam. For this I used a blanket stitch, which basically is a running stitch but you make a “knot” but running your needle through the loop you just created.

If you are doing this for Instagram, it looks done from the top!
6. Get the Sole ready for sewing
Now let’s combine the felt and the sole. Sew the felt to the sole with a simple button stitch. (The x shape you use for sewing buttons on your shirt or pants)

7. Attach the Sole to the Shoe
Next lay the sole of the shoe on top of the opening of the shoe. This is a little confusing. The first time I tried it, it didn’t make sense to me how it worked but it did, so do not worry. Also, make sure you are using the right sole on the right side of the shoe, you don’t want to worry later why you have two left feet.

Pin it together to make sewing it easier. I didn’t do this and ended up with extra fabric. Sew the top to the bottom with a simple running stitch. Remember to leave a space which we can use to fold the piece inside out so the felt will be on the inside of the show between the lining and the sole.

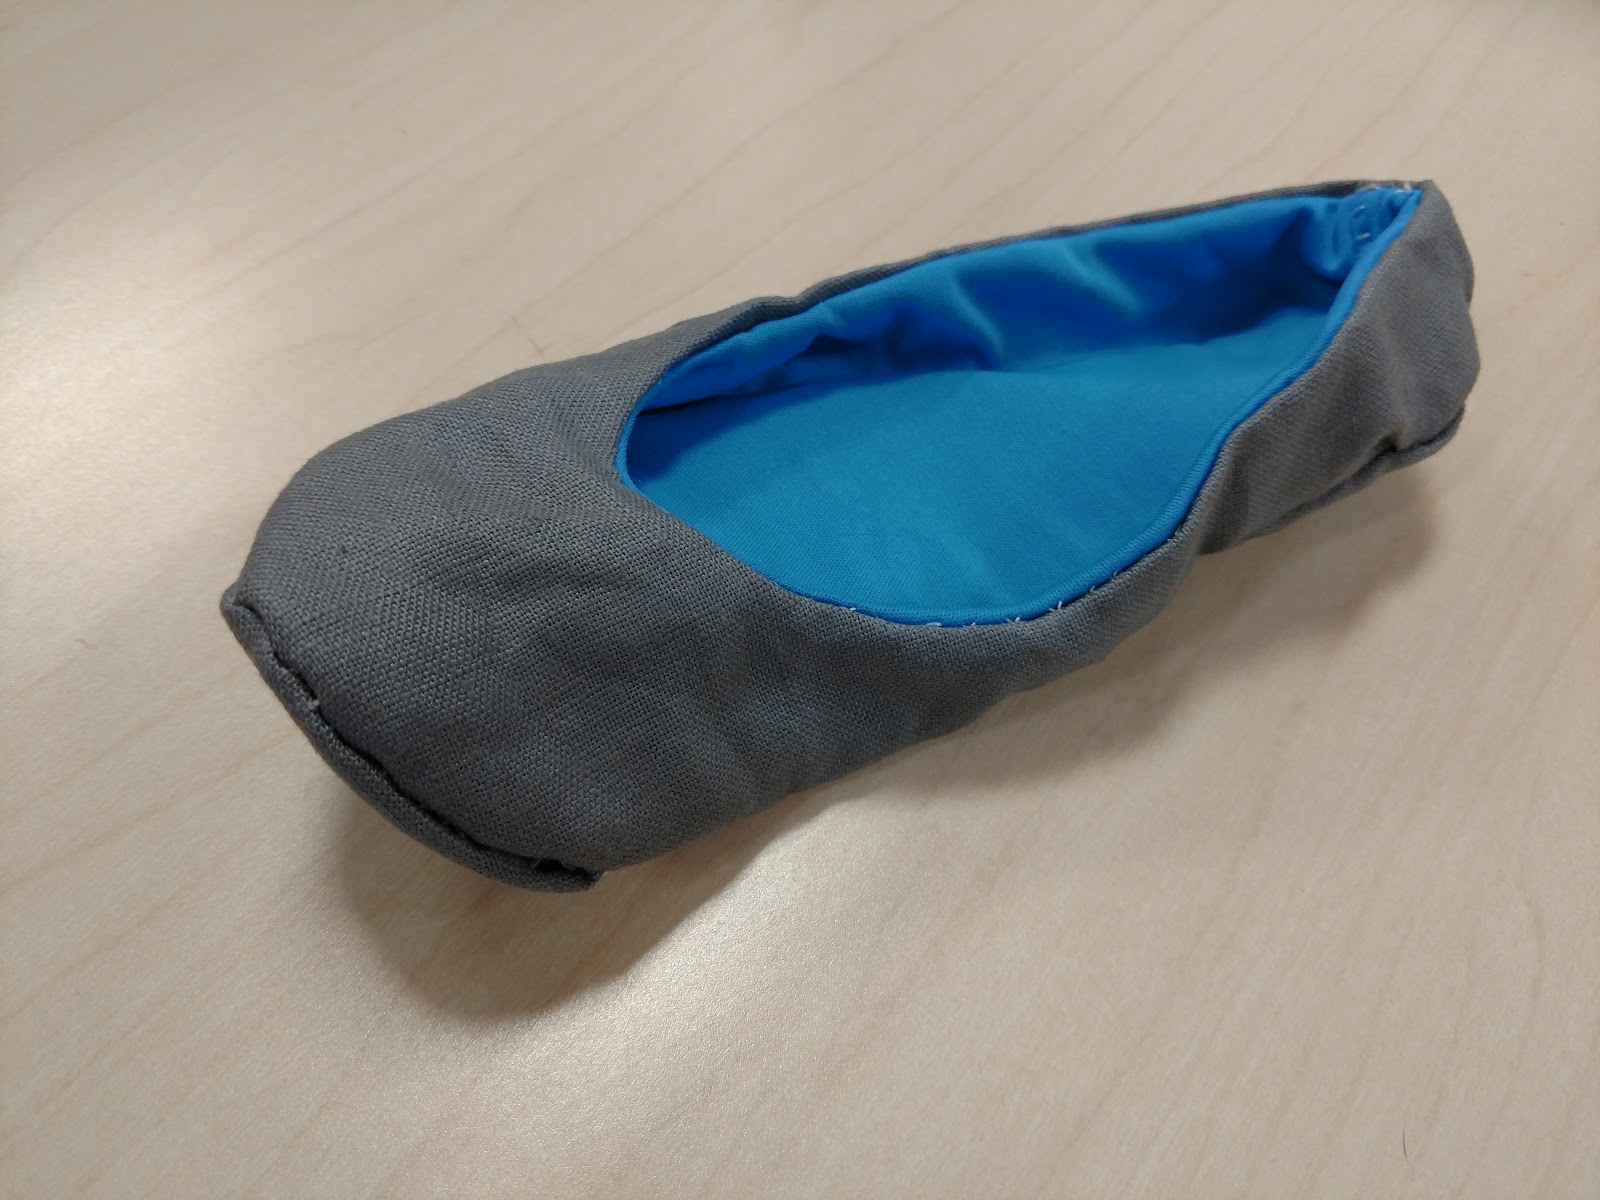
8. Finish the Shoe
Now we just need to turn it inside out.

Now we are going to use a blind stitch to sew the inside of the hole we used to turn the piece inside and out. If you don’t care about the thread showing, just use a running stitch. My blind stitch failed pretty miserably. If you do want to attempt a hemming stitch I have provided a link here for instructions.

Fantastic! Now we got a shoe perfect for around the house or for the campsite! Super easy to make and super lightweight. It basically folds down to the size that fits into a regular pocket. If wearing these shoes to the campsite, remember to make it out of water resistant fabric instead of cotton.


No comments:
Post a Comment